Troubling Consolidations
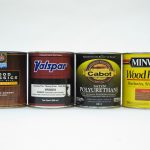
As in so many other industries, the companies who supply us with paints and finishes are consolidating at a rapid rate. When I started in this field 40 years ago, there were all sorts of local and regional suppliers. Every store carried its own unique brands. Minwax was a very small player. It was just announced that Sherwin-Williams is buying Valspar. In addition to its own brand, Valspar owns Cabot […]
The post Troubling Consolidations appeared first on Popular Woodworking Magazine.
Troubling Consolidations Read More »