Making a Vintage Stereo Console
I’ve been wanting to make this retro stereo cabinet for a while now. I spend a lot of time in my basement shop working and wanted to have a turntable in there to play records but also protected from dust. It uses some basic butt joint construction done with loose tenons and made from cherry plywood. The turntable is enclosed with a hinged lid and the stereo component compartments have a removable grill cloth face to keep dust out but allow air circulation.
I did run out of time for a few final details because I’m taking for for a trip. I still need to add some pulls to the front grill faces and lid support or a kickstand to hold the top open while changing records. Once I get back and complete these tasks I’ll post pictures down below and update the steps.
If you make this stereo cabinet please tweet me some pics so I can share it with the world. Thanks for dropping by and as always be safe, be passionate and make something
// PLANS WILL BE MADE AVAILABLE NEXT WEEK ///
Sign up for my email list to notified
Tools and Supplies Used


Step 1: Cut All Cabinet Pieces
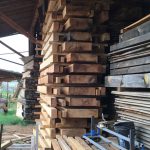
First thing to do is cut all pieces of the main cabinet to width and length out of cherry plywood. This includes the two sides, the three shelves, top, bottom and front faces. The plywood board I used came from Rockler and comes in 24″ x 48″ pieces. You will need 5 sheets. Exact dimensions are in the plans.

Step 2: Cut Edge Banding
To cover up the exposed edges of the plywood I’m cutting 3/16″ strips out of solid cherry. You can buy pre-made edge banding that can be ironed on but I prefer to make my own.

Step 3: Attach Edge Banding
Before gluing up the cabinet I attached the edge banding to the front faces of the shelves. This is easier done now because the shelves will be inset. Just add some glue and clamp them into place. You can use painters tape or these Rocker Bandy Clamps you see here. I suggest cutting the edge banding a little long as the excess can be removed in the next step. I also recommend having the edge banding slightly taller than the thickness of the plywood. Once the glue dries you can then flush it up. See step 5.

Step 4: Cut Off Excess
Once the glue dries on the edge banding you can use a flush trim saw to cut off the excess.

Step 5: Flush the Edge Banding
I’m using a scraper to flush the edge banding to the plywood. You can also use a card scraper or just sand it down. If you choose to sand it down be careful to not sand through the plywood veneer.

Step 6: Sanding
Now’s a good time to sand all the cabinet pieces as it’s much easier to sand before assembled.

Step 7: Cutting the Cabinet Joinery
There are many ways to butt joint the pieces of the cabinet. By far my favorite and one of the easiest ways is to use a Festool Domino mortising tool. The tool cuts a mortise into each piece and is connected with a pre-made loose tenon called a Domino. A much more economical and budget friendly way to join the pieces is to use dowel joinery using a dowel rod and a drill. To see how this is done check out my video “Dowel Joinery Tips and Technique”

Step 8: Cabinet Glue-up
Whether you are using Dominos or dowels, glue in the loose tenon and assemble the two sides, 3 shelves and the bottom. Apply glue to the tenons and where the two boards will meet and clamp it up. Once you get the clamps on make sure everything is square and adjust if necessary.

Step 9: Allow to Dry
Once you get the assembly clamped up, allow it to dry for a few hours.

Step 10: Final Edge Banding
You can now edge band the remaining exposed plywood edges.

Step 11: Route Inlay Groove
This is purely for a visual element and not necessary, but I’m routing a 1/4″ groove through the front face of the turntable compartment. This will accept a 1/4″ brass dowel rod.

Step 12: Brass Inlay
I then mix up some 5 minute epoxy and glue in the 1/4″ brass dowel rod. Brass is a very soft metal and can be cut to length with a hacksaw.

Step 13: Completing the Turntable Compartment
Next I attached the front and rear boards to the turntable compartment. I used three loose tenon Festool Dominos on the bottom and only glue on the sides. Afterwards I realized I should have added this during the initial glue-up so there would be reinforcement on two edges and not just one. Although I’m sure this will hold up just fine for the life of the cabinet. Be sure to add clamps and allow it to dry for a few hours.

Step 14: Resawing Plywood
The lower two compartments will have removable faces with grill cloth. I’m resawing the plywood faces that’ll make up the front grill. Resawing plywood is not a common technique and may cause the board to bow or cup as the tension is released. I didn’t have any issues with mine but you may want to use solid cherry for yours as the inside faces will have exposed plywood that will be visible in the final piece. See the end of the video above.

Step 15: Cutting Out the Grill Shape
I then printed out the grill template and attached it to one of the grill faces using spray adhesive. I cut the shape out on the bandsaw entering from one side going with the grain. This entry kerf will be closed up in the next step and will hardly be noticeable. Once I cut out the shape I traced it on the remaining pieces and cut them out on the bandsaw as well. You should have 4 pieces with this grill cutout.

Step 16: Close the Entry Kerf
Next you’ll glue the entry kerf made by the bandsaw. Just add a little glue and clamp it up.

Step 17: Grill Cloth Front Face
Next I cut some guitar amp grill cloth to the size of my panel and tape it down to my bench. Taping it down allows you to stretch it out and get a nice tight fit. Once taped down I glue the front face of the panel directly to it using some Titebond Quick and Thick glue. Throw some weight on top an let this dry for an hour or so and cut it loose from the bench.

Step 18: Grill Cloth Back Side
Now you can take the glued up assembly and glue on the back side. Again I’m using Titebond Quick and Thick glue but I’m guessing wood glue will work as well. Set some weight on top or use f-style clamps and allow it to dry. Repeat steps 17 and 18 for the second face.

Step 19: Edge Banding the Faces
Next you can edge band all the edges of the two face panels to cover up the exposed plywood.

Step 20: Lid Bumpers
Before attaching the lid I’m using adhesive backed, clear rubber bumpers on all for corners of the top.

Step 21: Cutting Piano Hinge
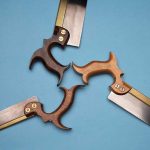
I’m just using an inexpensive piano hinge for my lid. This can be cut to length using a hacksaw.

Step 22: Attaching Piano Hinge
To attach the piano hinge I set the lid in place and use masking tape to position the hinge. I pre-drill all the holes to prevent splitting and screw it into place. Once all the screws are in you can remove them and pull off the tape and re-screw them back in place.

Step 23: Drilling the Cord Hole
Next you can drill out a hole for the turntable cables to go through. I’m using a 1 1/8″ forstner bit.

Step 24: Grill Panel Stops
I cut some 1/2″ wide solid cherry and glued them into the compartment sides. These will be used as stops for the grill panels. I add some velcro to the stops and the back of the panels.

Step 25: Add Feet
For the feet I’m just using some simple rubber feet that screw right into the bottom. If you’re using this cabinet to play records you will likely want to use rubber feet to absorb some floor vibrations that may happen when walking around the stereo.

Step 21: Spray Lacquer Finish
And to finish it off I take my cabinet outside and spray a few coats of rattle can spray lacquer made by Minwax. If I had more time to work on this project I probably would have used boiled linseed oil and polyurethane.