A Classic Book About Classic Woodworking Tools
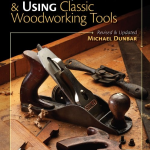
When you find an old tool, you have some work to do to get it into working condition – cleaning, sharpening, tuning and so forth. Once you’ve spent some time with it, often you’ll find that the tool is just as good (or even better) than one you could have bought new. Mike Dunbar’s original edition of “Restoring, Tuning and Using Classic Woodworking Tools” was written in 1989. It remained in print for […]
The post A Classic Book About Classic Woodworking Tools appeared first on Popular Woodworking Magazine.
A Classic Book About Classic Woodworking Tools Read More »